5. Use a small 1/8-inch slotted screwdriver to remove the C-ring shown in Figure 18.
6. Rotate the drive such that the disk opening is facing down and the eject motor is facing up. Use a small 1/8-inch slotted screwdriver to remove a single black flat-head screw behind the eject motor. Remove the top cover.
7. Rotate the drive such that the circuit board is facing up. As shown in Figure 19, use a small 1/8-inch slotted screwdriver to remove four gold-colored flat-head screws mounted beneath the circuit board.
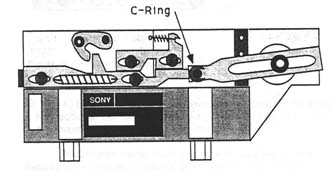
Figure 18 C-ring removal.
8. As shown in Figure 13-20, disengage the disk carrier mechanism from the chassis.
9. With clean paper towels, wipe up as much of the old sticky grease as you can. The more you wipe up now, the less you'll have to dissolve later.
10. Set up a disposable aluminum tray as shown in Figure 21. Hold the eject mechanism over the tray and spray the remaining grease away with WD-40.
11. Work the levers back and forth as shown in Figure 22. Arrows are shown on the release points. Work these points back and forth and respray as necessary until all of the old grease is gone.
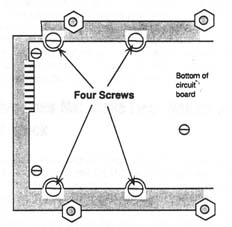
Figure 19 Carrier mechanism screw locations.
Note that the three additional gold-colored screws on top of the circuit board do not have to be removed.
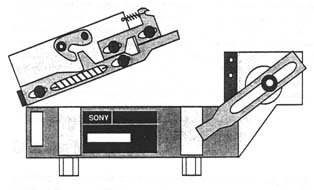
Figure 20 Carrier mechanism removal.