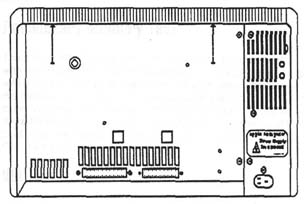
Figure 13 The top cover is removed by loosening two hidden screws attached to the roof of the chamber. Both screws are permanently attached to the chassis. They won't fall out!
number 341-0346 should be in the socket at D14, part number 341-0347 should be in the socket at D13. Any other part numbers indicate old (buggy) ROMs. Replace these on principle. It's usually not necessary to buy ROMs separately. The latest 3A ROMs are included with the XL Screen Kit, a video upgrade described later in this chapter.
3. Make sure there are no bent pins on the ROMs.
4. Make sure both chips are fully seated.
If you find any one of the above problems, pull the chips, replace them, reorient them, and/or straighten the pins as necessary.
MMU Register Test
An initial failure of the MMU Register Test causes an endless loop. When the CRT warms up, it'll be blank. Other failures display error code 40 and show a cross over the CPU board icon. (Refer to Table 3.) Both symptoms indicate a problem in the memory
management unit, which is made up of various static RAM chips. Each of these components is soldered in place which makes substitution very difficult.
When the MMU Register Test fails, make sure the CPU board is seated firmly, check for oxidation on the gold fingers, check for any obvious bad solder joints, and if that doesn't turn up anything, replace the board.
Memory Sizing
This test counts the installed memory. Errors are pretty much ignored, but if the memory can't be accessed at all, say both cards are missing, the speaker beeps, and the computer hangs with a series of alternating black and white stripes. The pattern is shown in Figure 14.
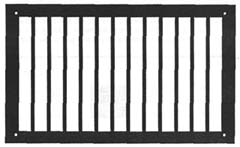
Figure 14 This pattern indicates total RAM failure. On the Lisa, Mac XL, Mac Plus, and Mac SE it generally means the cards and/or SIMMs are missing. On the 128K to 512KE with certain memory upgrades, it generally indicates a problem with the 68000 chip.
The fix is to install or reset the cards. If necessary, clean the contacts with a pencil eraser. They're gold plated so they should be nice and shiny. Remove the eraser dust with a dry cloth. Try